Showing posts with label Healthy. Show all posts

Sunday, September 30, 2012

Parmesan Crusted Chicken


We have this favorite meal in our house - well, actually we have many favorite meals - but one of these favorites is Tomato And Basil Capellini.  We have it quite often, but I had to figure out some type of chicken to go with it.  That's how I came up with Parmesan Crusted Chicken.   This chicken is easy, tasty, and the perfect accompaniment to our Tomato And Basil Capellini.


Ingredients:

6 thin chicken breasts
1/2 cup bread crumbs
1/2 cup parmesan cheese
1/2 tsp garlic powder
3/4 tsp thyme
1/2 tsp basil
1/2 tsp oregano
3/4 tsp salt
olive oil


In a shallow dish combine the bread crumbs, cheese, seasonings and salt.  Stir to combine.


Place chicken breasts in a plastic bag and pound until about 1/2 inch thin.  I just used a rolling pin - you could use a mallet if you had one.


Cover the bottom of a non-stick pan with olive oil - about 1/2 to 1 cup.  Heat oil on medium-high heat.

Then place the chicken in the bread crumb mixture and coat completely.


Once your oil is nice and hot, place the chicken in the oil.  Cook until golden brown - about 5 minutes.


Then flip the chicken over and cook on the other side - another 5 to 7 minutes.


This is what it looks like when your chicken is all done.  Crispy, juicy, seasoned perfectly and absolutely amazing!


Friday, June 15, 2012

Strawberry Mango Smoothie Pops


We absolutely love this simple summer treat.  I like that fact that there are very few ingredients and I can whip them up in just a few minutes.  My kids like the creamy frozen texture on a hot summer day.  Win win!


Ingredients:

Mango Section:
4 cups frozen mango
2 cup vanilla yogurt
1 cup orange juice

Strawberry Section:
4 cups frozen strawberries
2 cup vanilla yogurt
1 cup orange juice


Place frozen mango, yogurt, and juice in a blender.  Mix until combined.  This will be a large batch - I prefer to do it in halves so my blender isn't overloaded.

Pour mixture into small paper cups or popsicle containers - but only fill half full, not to the top.  Now you're going to mix the strawberry section.

Place frozen strawberries, yogurt, and juice in a  blender.  Mix until combined.  Pour into cups over the top of the mango mixture.

Wrap tops of cups with plastic wrap or tin foil and place a popsicle stick in the center.  Place into the freezer until set (about 4 hours or overnight).

These are a big hit at our house.....


Can't you tell....


However, I do have to admit that the mango section is our favorite.  The strawberry is a bit tart.  If you want you can use strawberry yogurt and apple juice in the strawberry combo.  It will sweeten it up a little.


Or you could just make a big batch of the mango and eat that.  We like that too.


Frozen, or in smoothie form, these things are just plain good!  So go out and make some to help keep you cool this summer!

Monday, February 20, 2012

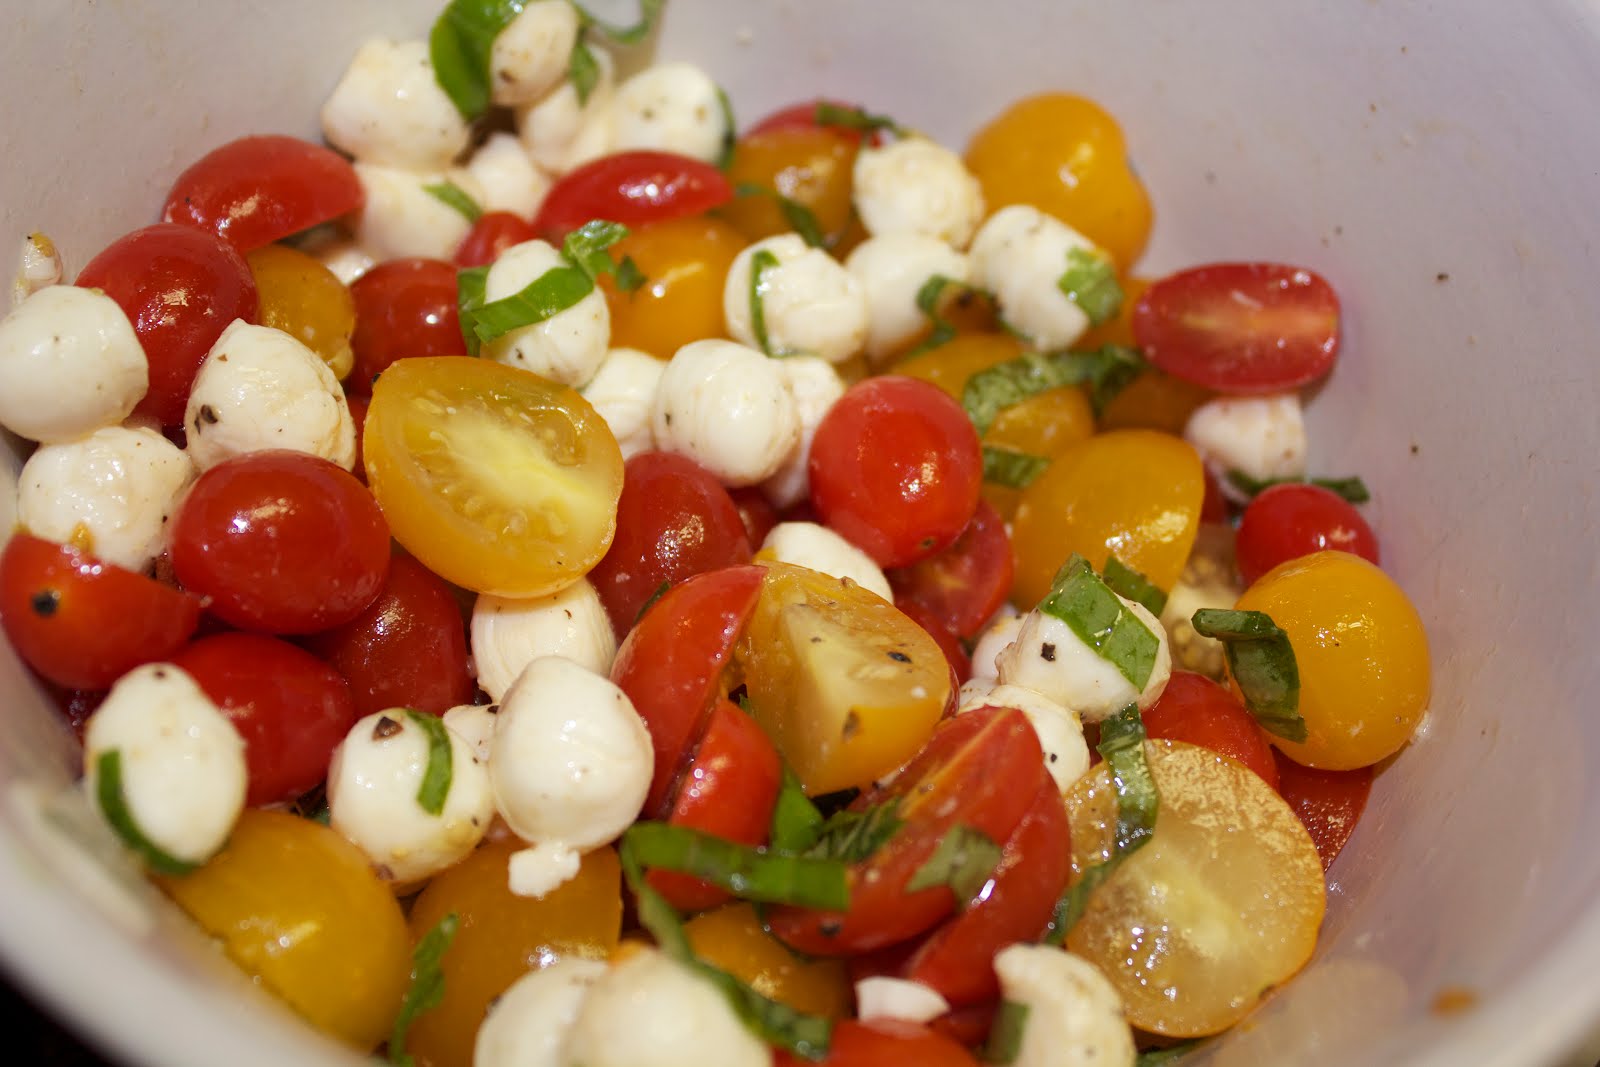
Tomato Basil Salad


This is the type of salad that is simple and yet so elegant. You just add a few ingredients and let them sit for a few minutes so that the flavors can combine. That's it!


Ingredients:

Tomatoes
Fresh Basil
Fresh Mozzarella
Salt
Pepper
Olive Oil

In a bowl, combine tomatoes and mozzarella. I used sweet yellow tomatoes and red grape tomatoes. I also used the small mozzarella balls but you could just as easily cut the mozzarella into small squares.

Julienne the basil and add it to the tomatoes. Sprinkle with salt and pepper; add a drizzle of olive oil and toss to combine.

Let it sit for about 5 minutes and then eat or refrigerate until ready to eat.

Roasted Parmesan Asparagus


This is really quite simple to make. I don't even have exact amounts on any of the ingredients, I just add a few simple ingredients and bake. What can be simpler than that?

Ingredients:

Asparagus
Olive Oil
Salt
Pepper
Shredded Parmesan Cheese


Wash your asparagus and break off the ends. If you bend your asparagus it will automatically break where it needs to. Wash the asparagus.

Place them on a large cookie sheet. Drizzle with olive oil and sprinkle with salt and pepper. Use your fingers to toss it all together and get all the asparagus coated.


Bake at 415 degrees for 8 to 9 minutes or until tender - don't over bake, you still want a little crunch.

Pull the asparagus out of the oven and immediately sprinkle with grated parmesan.


Serve while hot!

Wednesday, January 18, 2012

Talapia Fillets


I have to admit, I was not a fan of fish in my youth. Growing up I had tuna fish sandwiches and the occasional trout when we caught one from the river. As an adult, I have expanded my palate and discovered that I really do like fish. Hmm...who knew?

Luckily, my kids are not as reserved and they love fish. My five year old even asked for this as her birthday dinner - it's definitely a favorite in our house!


Ingredients:

8 small talapia fillets
3/4 cup flour
2 tsp Mrs. Dash
1 tsp salt
3 Tb olive oil


I always tend to buy my talapia in the frozen, individually vacuum sealed packages. So...if you're like me you want to take your fish out of the freezer and allow it to thaw before you begin cooking it.

Now, if you're even more like me, you will have forgotten to take your fish out of the freezer until right before you need it. If this is the case, then you're in luck! Talapia doesn't take very long to thaw, so all you do is fill a sink with cool water and place your individually vacuum sealed packages into the water for about 5 to 10 minutes. This will obviously not work unless your talapia is completely air tight.

Once your fish is thawed, you're ready to go!


Place the flour, salt, and Mrs. Dash seasonings in a shallow dish (like a pie plate). Mix them together with a fork.


Place 2 Tb. of olive oil in a skillet on the stove over medium to high heat.

Once your oil has had a few moments to heat up, place your fish in your flour mixture. Completely coat both sides of the talapia.


Then use a fork to transfer the talapia over to the frying pan. Do the same thing with the remaining fillets.

Don't over crown the frying pan - mine holds four at a time.

Cook for about 5 to 7 minutes and then.....


flip the fillets over and cook an additional 5 to 7 minutes (usually closer to 5).


Because I can only cook 4 fillets at a time (and I need 8 for my family), I will take the cooked tilapia and place it on a plate in a warm (not hot) oven while I cook the next batch.

This is where the additional oil comes it. Place 1 to 2 Tb. oil in the fry pan and start the process over again.

In the end you will have some yummy, and easy, talapia fillets.


You could just stop there and eat it with some rice. However if you want something a little fancier, you can make a sauce to go over the fish.

Take 1/4 to 1/2 cup water (or chicken stock) and add it to the fry pan. The flour left in the bottom of the pan from cooking the fish will act as a thickening agent. Stir constantly while you add the liquid and within a few minutes you will have a nice little sauce to go on your fish.


Whether you have it with the sauce, or without, your family will definitely enjoy this dinner!


*Served with herbed rice

Saturday, September 24, 2011

Roasted Summer Vegetables


These vegetables are perfect for the summer - such a beautiful collection of colors. Plus, they're super easy - a lot like the Roasted Potatoes I did a few weeks ago.


Ingredients:

1/2 a yellow pepper
1/2 a red pepper
1/2 a green pepper
2 small zucchini
1 small yellow squash
half an onion - yellow, red, it doesn't matter
1 to 2 Tb. olive oil
2 tsp. garlic powder
salt (usually around 1 1/2 tsp.)
pepper


Seed all the peppers and cut all the vegetables into chunks that are roughly the same size.

Spread all the vegetables on a large cookie sheet and drizzle with olive oil. Use your hands to mix vegetables all around and coat with olive oil. Sprinkle with garlic powder, salt, and pepper.


Place in 400 degree oven and bake for 15 to 20 minutes - depending on the size of your vegetable chunks. Remove from oven when vegetables are tender and transfer to a serving dish. Let them cool a bit and then eat.


Saturday, September 17, 2011

Black Bean & Mango Salsa


I've had this a few times at my friend Emily's home, but I never actually made it until I got some large mangos in my Bountiful Basket.

You can eat this on fish, on chicken, with tortilla chip, or straight out of the bowl with a fork - like I do!


Ingredients:

2 ripe mangos - peeled, pitted, and diced
1 15 oz. can of black beans - drained and rinsed
1/2 cup chopped red onions
1 small green pepper - seeded and chopped
1 small red pepper - seeded and chopped
1/2 cup Italian dressing - any kind
salt and pepper to taste


In a blender or magic bullet, blend 1/4 cup of mango with the Italian dressing until smooth.

In a bowl, combine the rest of the mayo with the beans, onions, and peppers. Add the mango puree and stir.

Season to taste. Chill until ready to serve.

Saturday, September 10, 2011

Chicken Spinach Roll-Ups


There is an amazing restaurant called Zoes Kitchen. If you've never heard of this place, you really need to check it out. They have these amazing spinach roll-ups that you can get with or without chicken. The first time I had them, I just knew that I would be trying to make these at home.

So....after a bunch of tries (ask my family - I think there were 7 or so), I finally came up with a recipe. These Chicken Spinach Roll-Ups are absolutely to die for!


Ingredients:

1 Tb. olive oil
1 lb. chicken cut into small slices
1/2 medium red onion - diced
1/2 red pepper - diced
3 cloves garlic - diced
1 lb. frozen spinach - thawed and drained
1 1/2 tsp. salt
4 oz. feta cheese
1 cup mozzarella cheese - shredded
9 to 10 flour tortillas


Heat olive oil in skillet until hot. Add chicken, onions, and pepper. Cook over medium high heat until chicken is done and onions and peppers are tender. Add garlic and sauté for 30 seconds to 1 minute.


Add drained spinach. (I like to to place my drained spinach in a cheesecloth or paper towel and squeeze all the extra water out - you want it nice and dry).

Add salt and stir to combine all ingredients.


Now throw in all that cheese. Yes...I know you are thinking that this can not be healthy with all that cheese, but if you really consider how many portions you are making this this, it's not that much cheese per person.

Continue to cook mixture until cheese melts.


Remove mixture from heat - it's time to make those Roll-Ups.

Scoop up some chicken spinach mixture and place it on top of the tortilla. Roll into a tube. You can get between 9 and 10 of these, so think of that when you're trying to come up with the exact amount of filling - I want to say it will be around 1/3 cup....ish....


Place your rolled tortillas onto a cookie sheet. You could brown these on a griddle or in a sauté pan on the stove, but I chose to do it in the oven - it's a little easier.


Turn your oven on Broil and bake just long enough for the tops to turn brown and the tortilla to get crunchy. You have to watch these constantly because you don't want them to burn.

See that? Nice and golden brown on the edges.


Remove from pan, slice in half on a diagonal and serve!

So good!


Thursday, September 8, 2011

Roasted Potatoes


Growing up in Idaho, I absolutely love potatoes. So, I was grateful that there were some in my basket last week. I decided to make a family favorite - Roasted Potatoes!

Now...have you ever known someone that just throws all the ingredients together, never telling you how much of this or how much of that to add to it? You know - that person that drives you nuts?! Well, today I'm going to be that person. But don't worry....with only 4 ingredients it's near to impossible to mess up these potatoes.


Ingredients:

Potatoes - preferably red or yukon (russets aren't quite as good for this)
Olive Oil
Salt
Pepper
Additional Seasonings - optional


Wash and scrub your potatoes. Cut into 1 inch uniform chunks. Place potatoes on a cookie sheet. You know your own family, so only do as many potatoes as you think your family will eat.


Drizzle some olive oil over the potatoes. For an entire cookie sheet of potatoes, I usually use about 2 Tablespoons (more or less) of oil. Once you've drizzled it on, use your hands to toss the potatoes.

Now it's time for some salt! Potatoes always need salt, and sometimes you might feel like you're using too much. But, those potatoes need it - just remember that.

Sprinkle on the salt, the pepper, and any additional seasonings you like. I decided to use my remaining Mrs. Dash - I had about 1 tsp. You could also use fresh chopped rosemary.


After the seasonings are all sprinkled on, you're going to need to get those hands dirty again. Use your hands to toss and mix the potatoes. This will evenly coat each one with all the seasonings.


The key to roasting these potatoes is the high temperature. Cook them at 415 degrees for about 20 minutes. I have heard to push that up to 425, but I've not tried that - if you do, let me know how it goes.

This next step is completely optional, but I will help to give the potatoes a golden look.

After the potatoes are nice and tender (use a fork to test them), turn up the oven to Broil and cooked them an additional 3 to 5 minutes to give them a more golden brown appearance.


Remove the potatoes from the oven. Allow them to cool slightly and then place in a serving dish. They will be really hot, so let them cool slightly before serving.


Tuesday, August 23, 2011

Asian Chicken Salad

School Lunch Week

Day 2
Asian Chicken Salad


I'm actually quite surprised that my kids like this and eat it! But, hey...I guess they're culinarily adventurous - who knew?

This is a nice crunchy salad that can be made the night before - which truthfully every mom loves because the mornings are so crazy!

Ingredients:

1 cup shredded chicken
1 cup carrots
3 cups cabbage
1/4 cup chopped chives
1/2 cup asian salad dressing
peanuts (optional)
bean sprouts (optional)


Begin by cooking your chicken. I like to boil mine and then shred it. Once your chicken is shredded, place it in a bowl.


Cut your carrots into thin long strips - or just buy the prepackaged matchstick carrots and measure out a cup. ; )

Place the carrots in the bowl with the chicken.


Take a head of green cabbage (washed, of course) and thinly slice. You want the same style of cabbage that you would use for coleslaw.

Throw in the chives - if you don't have chives, just cut the green tops off of some green onions. They work just great.

Throw the cabbage and the onions into the bowl.


Now for that dressing. I like to use Newman's Own Lowfat Sesame Ginger. But you can use whatever you prefer. I also like the Kraft kind (can't think of the name) but this one is my favorite.

Pour the dressing over the salad and toss to combine and coat all ingredients.


If you want to throw in some bean sprouts or peanuts, now's the time. I thought I might be pushing my luck if I added any, so I decided to go with the basic salad for my kids...no need to scare them away with something new.

Eat salad immediately, or place in fridge until ready to serve. Personally I like mine cold.


The kids had the Asian Chicken Salad with grapes (no those are not olives), water, go-gurts, and granola bars.

Yum, yum.

LinkWithin

Related Posts Plugin for WordPress, Blogger...